How to create a junction object – Objects in Salesforce
Let’s now use a recruitment app example to see how junction object relationships can be established in Salesforce. Simply follow the next steps to construct the logic for your recruitment app:
- Create a recruitment project custom object:
I. Use Data Type Text Name for an object.
II. Check the Launch New Custom Tab Wizard after saving this custom object checkbox:
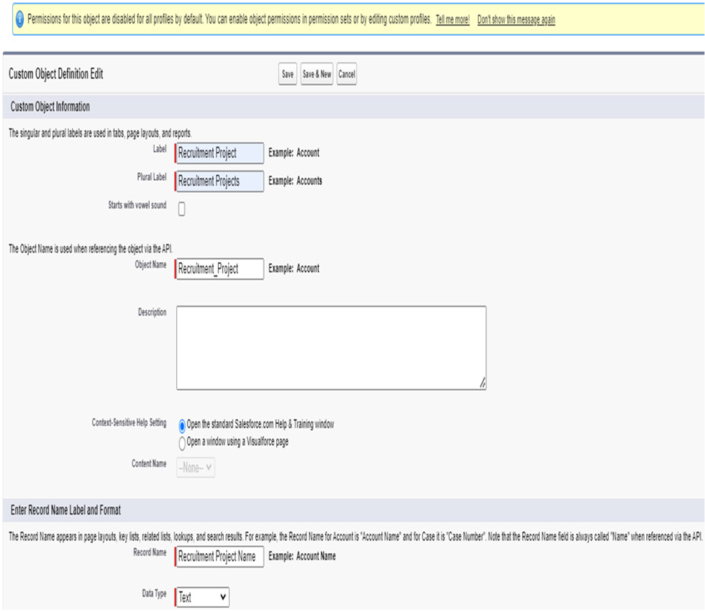
Figure 5.8 – Recruitment Project object
- Create a candidate custom object:
I. Use the auto-number data type for the record name format; for example, CAN-{000000}.
II. Create two custom text area fields (255 characters each): Name and Surname:
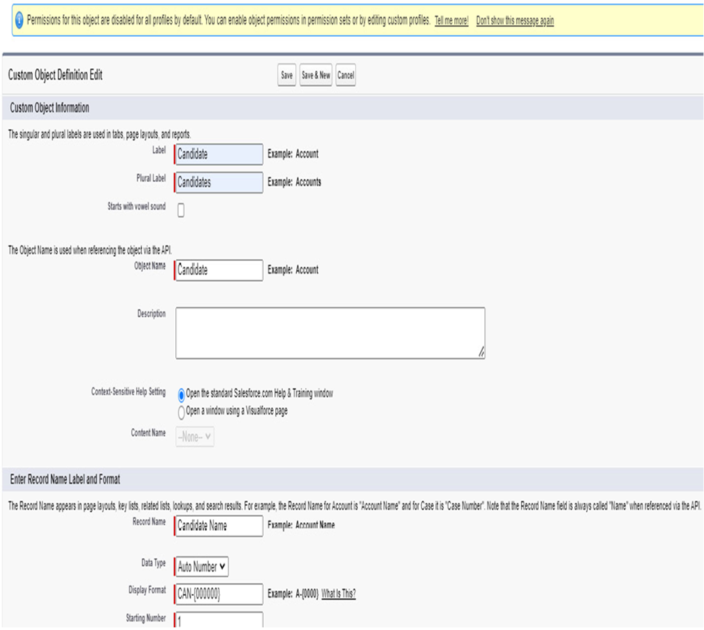
Figure 5.9 – Candidate object
III. Check Launch New Custom Tab Wizard after saving this custom object.
- Create a candidate application custom junction object:
I. Use the auto-number data type for the record name format; for example. CAP-{000000}.
II. Create two custom master-detail relationship fields: Recruitment Project (related to the Recruitment Project object) and Candidate (related to the Candidate object):

Figure 5.10 – Candidate Application object
III. Check Launch New Custom Tab Wizard after saving this custom object.
- Update the Recruitment Project related list to show the name and surname of the candidate:
I. Go to the Recruitment Project object in Setup.
Go to Page Layout, click on the name of the layout to enter edit mode, and add two fields (columns), Name and Surname, to the Candidate Applications related list to be able to see them in the Recruitment Project record. Remember to save your changes:

Figure 5.11 – Recruitment Project object related list update
- Test your solution:
• Create two Recruitment Project records:
• Go to the Recruitment Project tab, then do the following:
i. Create two Recruitment Project records:
• First project name: Sales Director
• Second project name: Sales Representative:
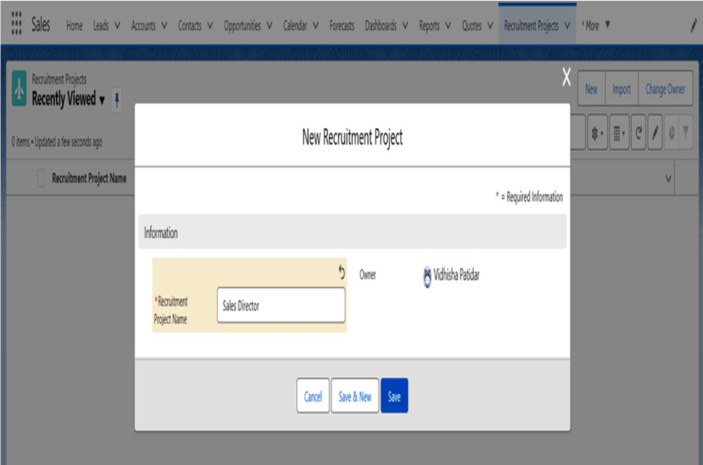
Figure 5.12 – Recruitment Project record creation
III. Create a Candidate record:
Go to the Candidate tab, then do the following:
i. Click New to create a Candidate record:
• Name: John Doe:
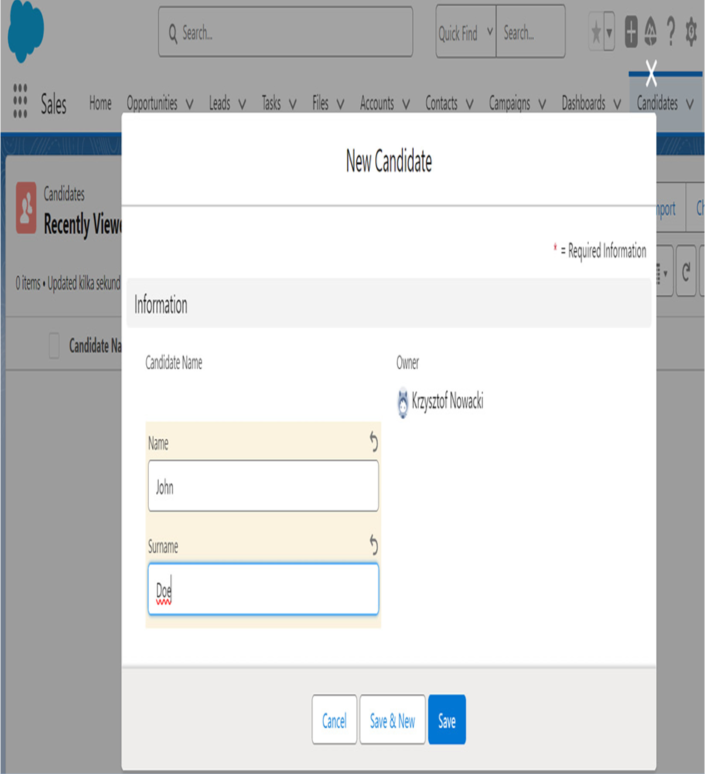
Figure 5.13 – Candidate record creation
IV. Create Candidate Application records for each recruitment project:
i. Go to candidate record John Doe (CAN-000001) )
ii. Create two Candidate Application records:
• Go to the candidate record Related tab.
• Click the New button on the Candidate Application Related list.
• The Candidate field will be already prepopulated.
• Fill in the Recruitment Project field. For the first record, choose Sales Director and for the second, choose Sales Representative:

Figure 5.14 – Candidate application record creation
V. See the results – now, you can see that on two existing Recruitment Project records, Sales Director and Sales Representative, you have two candidate applications (one for each) received from the one and the same candidate, which is John Doe. Simple and funky, isn’t it?
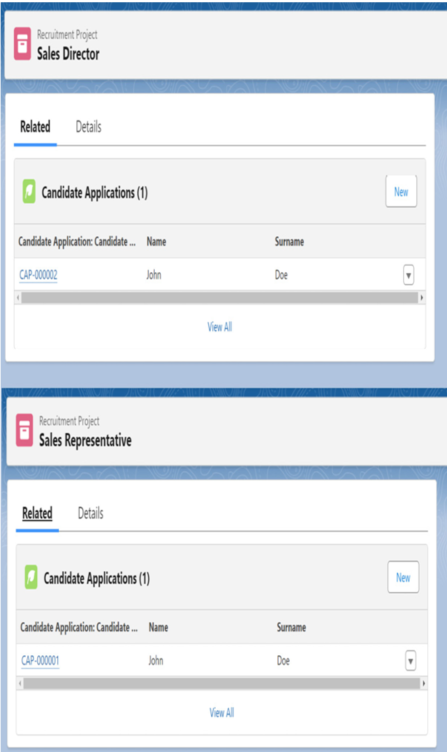
Figure 5.15 – Candidate application visibility in two recruitment projects
You’ve just acquired the skill to create Salesforce many-to-many relationships using a junction object. This knowledge is incredibly powerful, as the creation of many-to-many relationships is a crucial aspect of numerous business requirements. Now, you are well prepared and fully capable of mastering this task with confidence. In the next section, you will learn about a different interesting type of Salesforce object called external objects.